Instructions to change iOS Mail for the new mail server.
Step #1: Launch Settings
If you have re-arranged your home screen and Settings is not readily visible, you may swipe right and begin typing “Settings” into the search field to launch the app.
Step #2: Open the Email Account
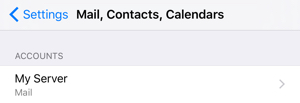
- In the Settings app, navigate to Mail
- Tap the account name to view the account.
Step #3: Open Account Settings
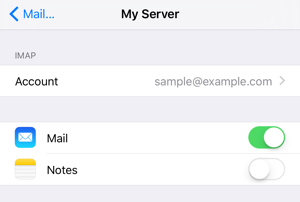
On the main screen for your email account, tap on the email address near the top of the screen next to Account to access the account’s settings.
Step #4: Edit Account Settings
A. Incoming Mail Server setup
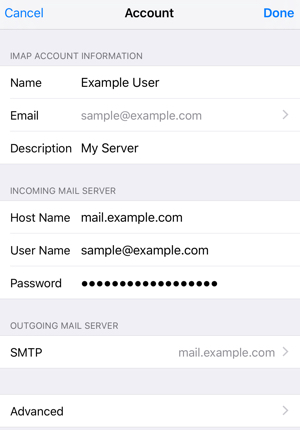
- Host Name: mail.wonderwave.net
- User Name is your full email address.
- is the email account’s password.
B. Connection Type and Port Configuration
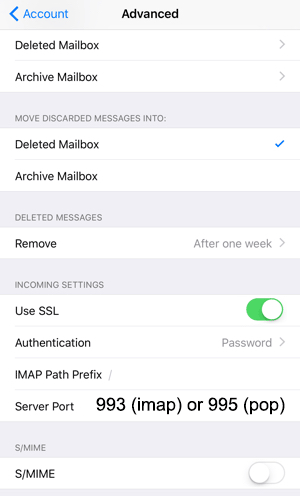
- Use SSL: should be on.
- should be set to Password.
- Server Port setting is dependent on your connection type:
- The secure IMAP port is 993.
- The secure POP port is 995.
C. Outgoing Mail Server setup
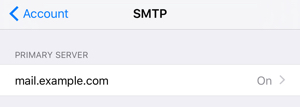
Outgoing server settings are configured from the Account screen. Tap Account in the top-left corner to go back to it, and then tap the server name under Outgoing Mail Server to bring up the SMTP page.
On the mail server page, tap on the name of your mail server to access its settings.
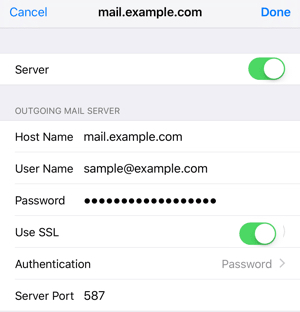
- Host Name: mail.wonderwave.net
- User Name is your full email address.
- is the email account’s password.
- Use SSL switch: Should be on.
- should be set to Password.
- Server Port should be set to 587.


